Build Status Traffic Lights
August 29, 2013
Recently I got the time to knock up a set of build status traffic lights for the office. It’s likely that I am the world’s greatest fan of Continuous Integration. I’m not going to bang on about why it’s a good idea here, suffice it to say that anyone who isn’t rabidly devoted to the greenness of the build will surely pay the price in time.
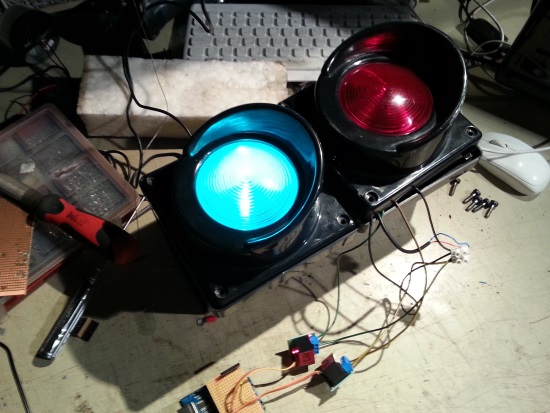
The lights themselves are from eBay. They were 24v and fitted with huge great bulbs which left no room inside for anything else. I swapped these out for some 12v LED brake light bulbs, which are fitted into some DIY holders made of nylon bar and odds and sods. Looking back, I’d have just soldered a load of LEDs to a circle of stripboard, but I went with what I had at the time.
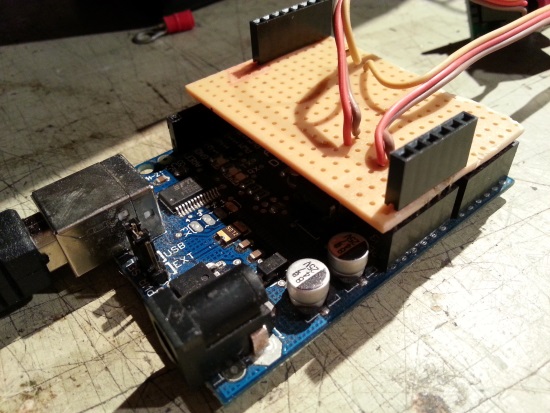
The lights are switched by two of these great little relay boards. Each one comes assembled and ready to go - they just need connections for 5v, ground and signal. If I’d have gone with the DIY LEDs-on-stripboard design I guess I could have used a transistor circuit but I do love the loud mechanical clunk that the relays make when the lights change. It adds to the antique feel of the project. I did use stripboard to make a “shield” to connect the relay cables to an old Arduino I had knocking about.
It’s worth noting that you can get an Arduino relay shield (and I do in fact have one in the garage) but it seemed like overkill to use such an expensive board, with twice as many relays as I needed.
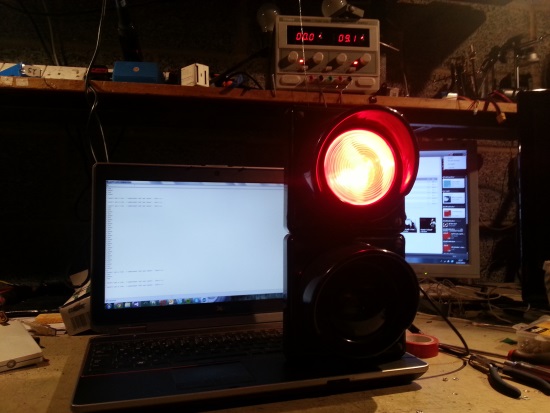
Power for the lamps is supplied by a 12v wall adaptor I got from Maplins. Again, a custom LED solution would have allowed me to use the 5v USB supply… but hindsight is richer than I am. I installed a line socket for the power, so when the PAT testing man comes round the office he won’t test the lights, just the wall supply.
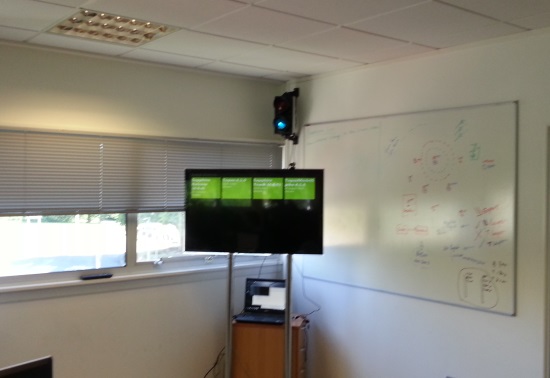
The arduino inside the lights implements a very simple serial protocol. It listens for commands “red”, “green” and “off”, terminated with a newline. There’s a USB connection to the old laptop which drives our Information Radiator TV; the idea with the traffic lights was to keep all the intelligence on the PC end to make upgrades and changes easier. Here’s the arduino code. Told you it was simple!
const int redPin = 2;
const int greenPin = 3;
int redState = LOW;
int greenState = LOW;
long interval = 1000;
String inputString = "";
boolean stringComplete = false;

void setup() {
  inputString.reserve(200);

  pinMode(redPin, OUTPUT);
  pinMode(greenPin, OUTPUT);

  Serial.begin(9600);
}

void loop()
{
  if(stringComplete) {
    stringComplete = false;

    if (inputString.equalsIgnoreCase("off")) {
      redState = LOW;
      greenState = LOW;
    }
    else if (inputString.equalsIgnoreCase("red")) {
      redState = HIGH;
      greenState = LOW;
    }
    else if(inputString.equalsIgnoreCase("green")) {
      redState = LOW;
      greenState = HIGH;
    }

    inputString = "";
  }

  digitalWrite(redPin, redState);
  digitalWrite(greenPin, greenState);
}

void serialEvent() {
  while (Serial.available()) {
    char inChar = (char)Serial.read();

    if (inChar == '\n') {
      stringComplete = true;
    }
    else if(inChar != '\r') {
      inputString += inChar;
    }
  }
}
The code on the PC end is a little more complex, but all the heavy lifting is done by Team City Sharp which connects to our Team City server and get the status of our multitude of builds. The only other complicated thing it does is open a serial port and dump the commands “red” and “green” to show the build status. It also sends “off” at 7 o’clock in the evening… just in case a red light shining from an office window at midnight were to attract the attention of the local constabulary.